Brisket burnt ends are a true claim to fame for Kansas City barbecue. Expand your repertoire of BBQ skills by learning how to make these delicious ends with our how-to guide.
Making Brisket Burnt Ends Kansas City BBQ Style
Sweet and spicy with thick, tomatoey sauce, Kansas City barbecue is one of the major styles of barbecue.
You’ll find just about every kind of meat in a traditional Kansas City barbecue, from pulled pork to ribs and lamb to roasted fish and chicken.
Served with a variety of sides, especially baked beans and fries, a Kansas City barbecue is definitely a treat.
Above all the rest of the traditional Kansas City cooking, however, you’ll find burnt ends- the true claim to fame for Kansas City barbecue.
These flavorful, fatty pieces of brisket need to be cooked for much longer than the leaner bits, which is one reason why these odd-shaped cuts of meat are often discarded in other barbecue styles.
However, if you put these pieces back in the smoker for just a little bit longer, the result is a tender delicacy with a mouthwatering bark that is unlike any other cut of meat.
If you’re looking to expand your repertoire of barbecuing skills, burnt ends are a great dish for crowd-pleasing that require very little extra efforts on your part. So, without further ado, let’s get to the basics of how to make burnt ends.
What You Need to Make Burnt Ends
- A reliable smoker
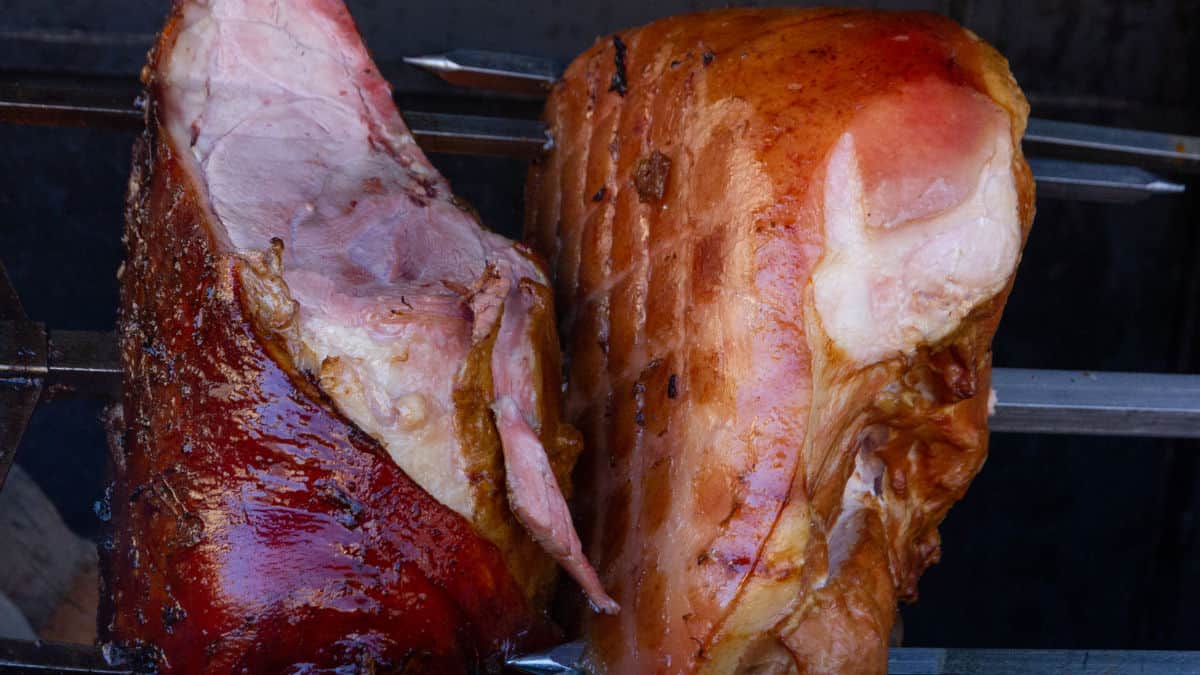
- A whole beef brisket (with both the first and second cuts of meat, called the flat piece and point, respectively)
- Spices and sugar to make your preferred rub
- Optional: Kansas-style Sauce
A Word on Rubs
One of the reasons that barbecue is so delicious is that it combines savory and sweet flavors. While you can play with the ultimate ratio of spices, adding things like cayenne pepper to give your barbecue a good, Kansas City kick, you don’t want to skimp on the sugar.
For ten pounds of brisket, consider using as much as two cups of sugar — preferably one cup of brown sugar and one cup of white sugar.
The molasses in the brown sugar is especially important because it adds a complex, sweet flavor that glazes very well to make the brisket’s crust.
What Makes a Kansas City Sauce?
While the central Texas-style philosophy is that a tasty barbecue should never need a sauce, Kansas City is all about mixing the sweet, tangy, and spicy.
As such, don’t hesitate to serve brisket and burnt ends with a side of homemade, tomato-based sauce to complete the flavor profile.
Nevertheless, if you hold true to a sauce-free philosophy, a powerful rub and the right smoking conditions should be all you need to make a flavorful meal. If you don’t feel like making your own sauce, you can try one of these below:
How to Make Burnt Ends
Get Your Smoker Ready
To get the best flavor, you’ll want to start off with a clean, well-seasoned smoker.
If you can, use a mild wood like oak, hickory, pecan, or cherry to heat the chamber to a stable 250°F.
Because it takes about one hour to cook a pound of brisket, you’ll likely be cooking for the better part of the day. As such, you’ll definitely want to make sure you’re working in very stable temperature conditions; otherwise, you’ll lose a lot of time waiting for the smoker to get back up to temperature.
Prepare Your Meat with Rub
This is a crucial step because it is at the very beginning of the cooking process, before you even start cooking, that you will really add flavor to the meat. The kind of rub you use will also determine how much of a crust there is on the brisket, so take your time to ensure that your brisket is evenly and well coated.
Once the meat is coated, you will also want to take some time and do as the name insinuates: you’ll want to rub the spices into the meat. This makes it so that the fat won’t remove the spices from your meat as it drips off during the cook.
When you prepare your rub, keep in mind that you’ll also need to add spices to finish off your burnt ends. To keep a homogeneous flavor, it is best to prepare enough rub to coat the flat part of your brisket and to have some left over to flavor the point later on.
Cook the Meat (And Prepare Your Sauce)
After your smoker is hot and your meat is rubbed down, you can start the cooking process.
Just the same as the other cuts of meat you are already used to cooking, you’ll want to check in on the temperature of the smoker regularly to make sure it is at 250°F.
Try to keep the smoke level stable as well. You’ll keep the meat cooking until the interior of the brisket reaches 170 to 185°F.
If you are planning on serving sauce with your brisket, you’ll probably want to take advantage of the many hours you have of waiting time to prepare the sauce.
Kansas City barbecue can be served with just about any barbecue sauce you like, but the tradition is to combine the savory profile of tomato and vinegar with the sweetness of molasses.
Separate the Flat Part from the Point
The burnt ends magic begins when the flat part of your brisket is cooked. You’ll want to remove the brisket from the heat, but keep the smoker hot.
Separate the point from the flat end, and cut off the visible fat that is left on the point.
This is also a good time to start cutting and serving the flat part of the brisket.
After a long day of waiting for your cook to finish, you’re probably dying to try it out — and your friends and family are probably even more eager after smelling the smoker all day long.
Check out the video below for the specifics on how to slice the brisket.
Add More Rub to the Point
Don’t settle down too much, however! Once the point of your brisket has been trimmed of the visible fat, coat it with a little bit more of the rub.
This will help you to solidify the bark that has already started to form on the point, thereby helping you to elevate the flavors in the final burnt ends product.
Finish Cooking the Point
Just like the necessity of waiting for a good brisket, you will have just a little bit more time to wait for your burnt ends to finish.
However, you have two options for getting your final product: you can return the brisket point to the smoker, or you can finish the burnt ends off in the oven.
In either case, you’ll need to get the internal temperature of the brisket point up to 200°F and then let the meat sit for an additional twenty minutes — the perfect amount of time to celebrate the end of your cook with a quick beer!
Smoker or Oven?
While burnt ends are traditionally finished in the smoker, you might prefer to keep the brisket point inside to finish them.
The advantage of using the smoker, of course, is that it will likely still be hot enough to quickly get the internal temperature to 200°F. You’ll also benefit from additional smoke exposure time that certainly won’t hurt the end product.
Conversely, cooking brisket can take so much of the day that you might not have any daylight left by the time you are trying to finish your burnt ends. If you feel that it is unsafe to keep cooking outdoors at this point in your cook, you can achieve roughly the same effect by cooking the point at 350°F in your oven.
In either case, don’t forget to let your meat sit for twenty minutes after it has reached an internal temperature of 200°F.
Serve and Enjoy
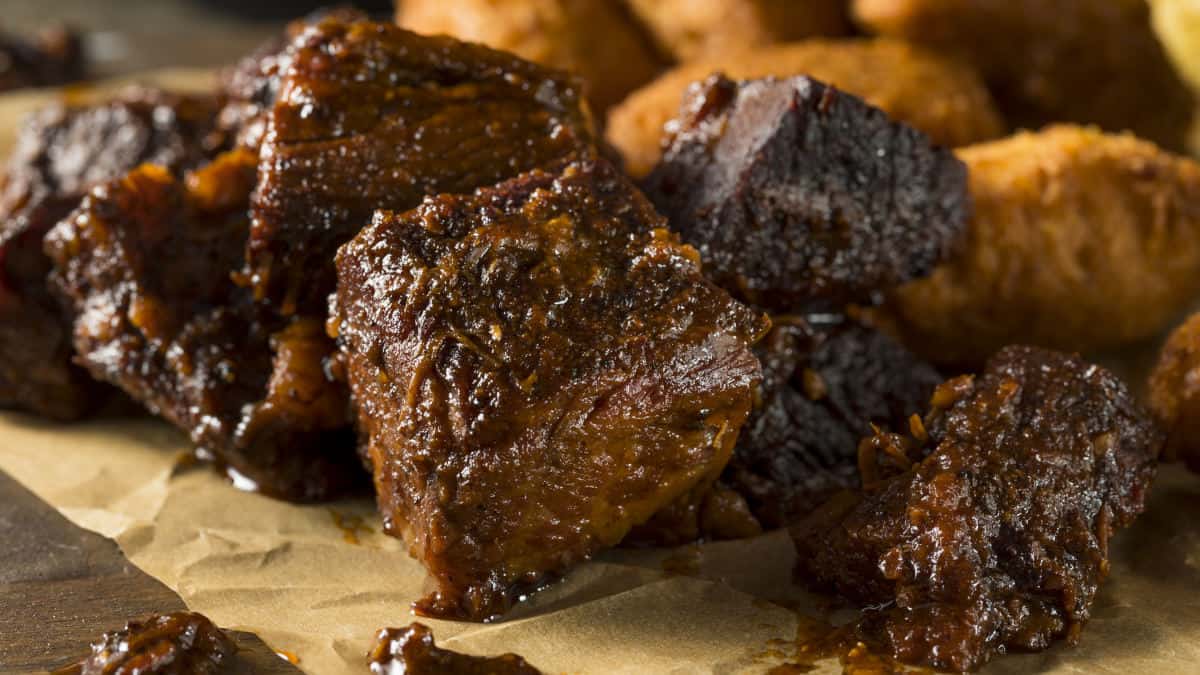
No matter how you choose to finish your burnt ends, after you’ve let the meat sit for a few minutes, it’s time to dig in! Burnt ends are best served hot, so quickly cut the point into bite size pieces, and enjoy.
Conclusion
The art and philosophy of barbecuing only becomes more complex as it becomes more and more popular.
With several cultural epicenters guiding the movement of home-style barbecue and smoking, it can sometimes be overwhelming for beginners and masters alike. This can also mean that certain techniques sometimes seem too mysterious to even bother trying.
Hopefully you see now, however, that even a very unique dish like burnt ends is not mysterious, nor is it difficult.
With just a little bit more work after you have finished a tasty brisket, you can transform the part of the brisket that you may have previously discarded and make it the perfect show stopper for your friends and family.
Better yet, hopefully you now feel confident enough now to try out making your own burnt ends!